30 April 2016
Building Paper Roller Coasters
As the culminating activity for our Force & Motion unit, we created paper roller coasters. You can purchase the paper roller coaster kits by clicking here. We began by making the framework, then added the roller coaster elements, testing them as we went. Once the coasters were finished, students created names for their coasters and posters and descriptions of the ride the marble takes on their coaster. Students each had a specific job.


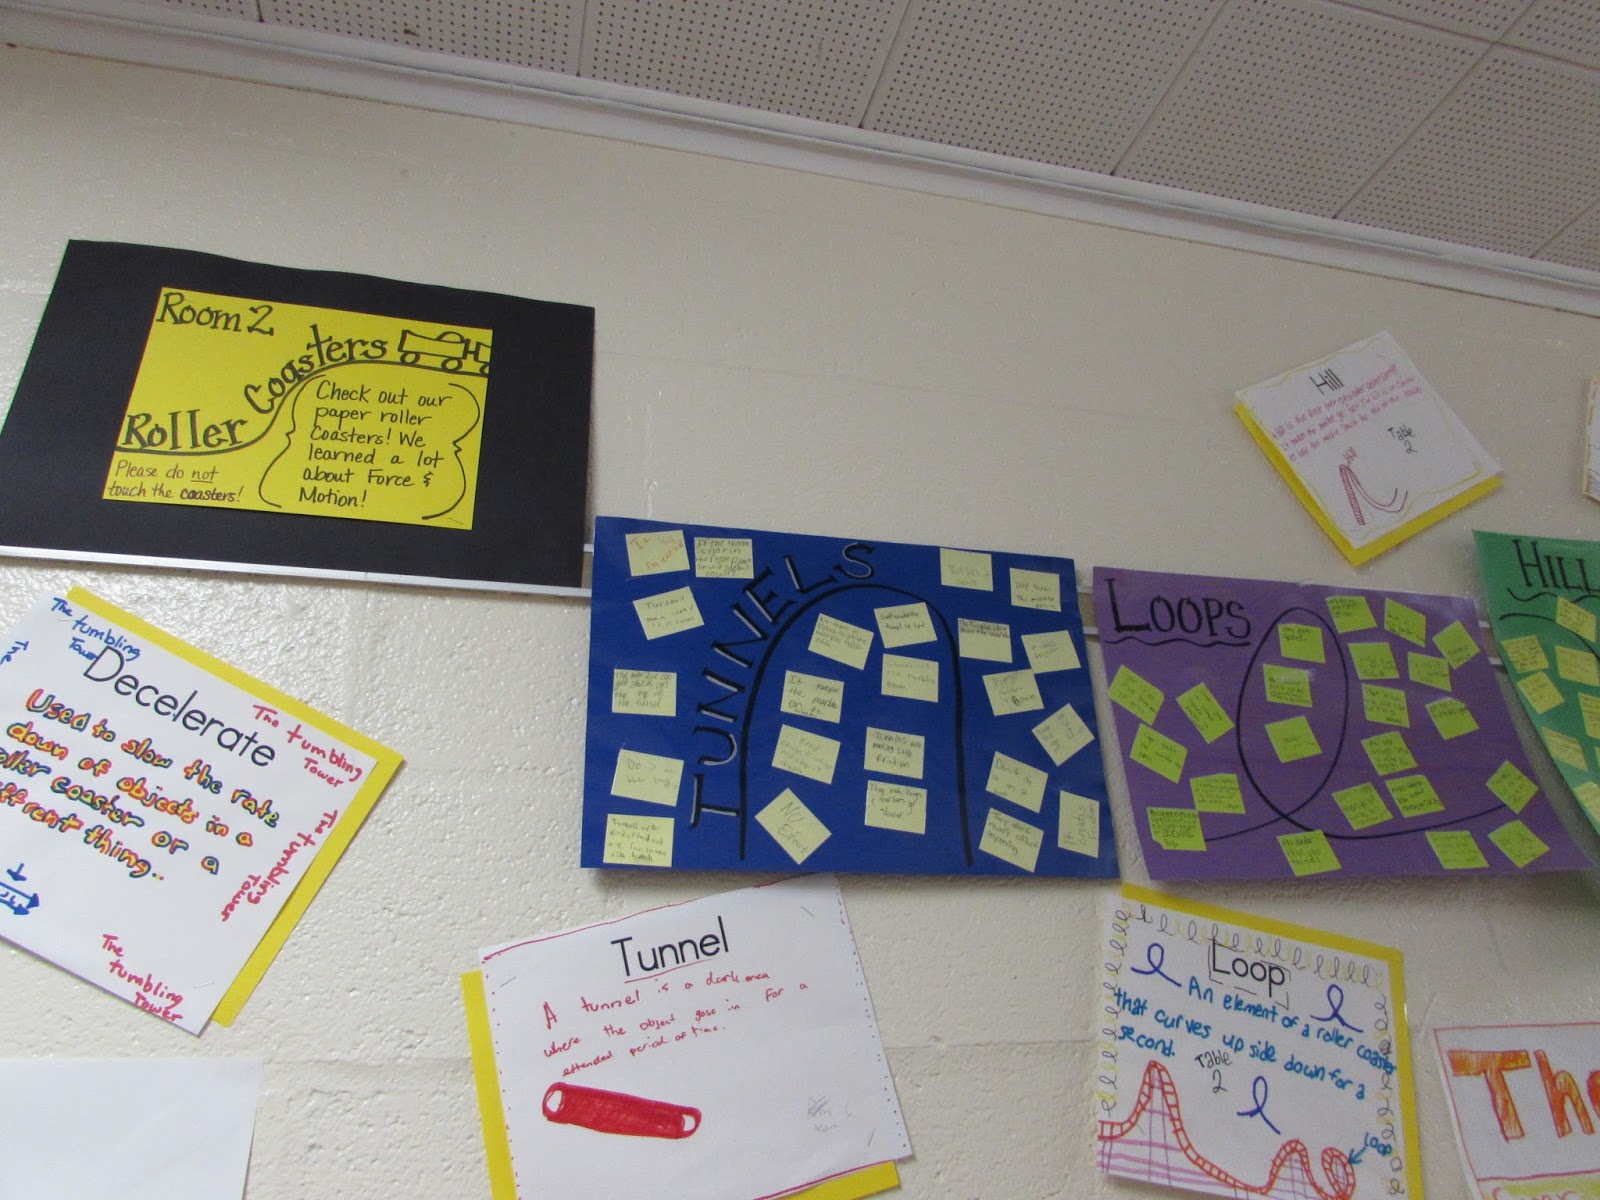
We also created vocabulary posters related to the science behind the challenges. These posters have a definition written in the students' own words as well as a diagram to illustrate the word.

If you are interested in purchasing the roller coaster starter pack (with foam pipe insulation), click here.


As you can see from the photos, each design is unique. The paper roller coaster kits allow for a lot of student choice in their roller coaster designs!


We did roller coaster labs with pipe insulation before trying the paper roller coasters. In those labs, students worked on understanding each individual element (loops, curves, hills, corkscrews, tunnels, hills) and the effect each element had on their marble. We created posters and students recorded their observations on post-it notes.


If you are interested in purchasing the roller coaster starter pack (with foam pipe insulation), click here.
Make Your Own Butterfly Hatcheries
Even though I teach intermediate students, they are still fascinated by seeing any animal go through its life cycle. We have painted lady caterpillars in our classroom right now. They came to us as tiny larvae (caterpillars) and they have now each formed a chrysalis. I decided to have each student create their very own place for the chrysalis to hatch. It was actually really easy!
Materials (for each student):
4 empty milk cartons (we collected them in the lunchroom)
masking tape
a piece of felt
a piece of tulle
4 craft sticks
2 bamboo skewers
yarn
paper clips
This is what they finished hatcheries look like...

The chrysalis is secured to the bamboo skewers (which are located in the middle). The four craft sticks are placed on the corners and then the tulle is wrapped around it and tied at the top with yarn. Paper clips are used to secure the tulle to the craft sticks if there are any holes/gaps.

Here is a close up view of the finished hatchery. A sponge of sugar water in a petri dish can be added once the butterflies have hatched. The butterflies may even lay eggs on the tulle and you can start the process over again!
UPDATE! They hatched! The kids were SO excited!

Materials (for each student):
4 empty milk cartons (we collected them in the lunchroom)
masking tape
a piece of felt
a piece of tulle
4 craft sticks
2 bamboo skewers
yarn
paper clips
This is what they finished hatcheries look like...

The chrysalis is secured to the bamboo skewers (which are located in the middle). The four craft sticks are placed on the corners and then the tulle is wrapped around it and tied at the top with yarn. Paper clips are used to secure the tulle to the craft sticks if there are any holes/gaps.

Here is a close up view of the finished hatchery. A sponge of sugar water in a petri dish can be added once the butterflies have hatched. The butterflies may even lay eggs on the tulle and you can start the process over again!
UPDATE! They hatched! The kids were SO excited!

16 February 2016
Teaching Growth Mindset using STEM Challenges
The concept of a growth mindset was developed by psychologist Carol Dweck and popularized in her book, Mindset: The New Psychology of Success. In recent years, many schools and educators have started using Dweck’s theories to inform how they teach students.
“In a growth mindset, people believe that their most basic abilities can be developed through dedication and hard work—brains and talent are just the starting point. This view creates a love of learning and a resilience that is essential for great accomplishment,” writes Dweck.
Students who embrace growth mindsets—the belief that they can learn more or become smarter if they work hard and persevere—may learn more, learn it more quickly, and view challenges and failures as opportunities to improve their learning and skills.
STEM Challenges are all about this idea of working hard and persevering. In the course of doing a STEM Challenge, students see their failures as opportunities to improve their learning and skill at that particular challenge.
As I approach the topic of Growth Mindset with my students, I use a pretty simple lab. Students must build a flashlight, but there's a catch, they must do it one piece at a time and no one student can do two parts back to back.

Each group needs a disassembled flashlight (I get the mini flashlights from the Dollar Tree) with batteries. You will need to take it apart into as many pieces as possible. Students need to work together to build the flashlight in the fastest time. While it seems easy, this lab takes students awhile to figure out, then even longer to get a pretty fast time. The challenge of working together to build it, with each student doing different parts, is a tough one.
You can get the flashlight lab here. Ready to open the world of growth mindset to your students?
“In a growth mindset, people believe that their most basic abilities can be developed through dedication and hard work—brains and talent are just the starting point. This view creates a love of learning and a resilience that is essential for great accomplishment,” writes Dweck.
Students who embrace growth mindsets—the belief that they can learn more or become smarter if they work hard and persevere—may learn more, learn it more quickly, and view challenges and failures as opportunities to improve their learning and skills.
STEM Challenges are all about this idea of working hard and persevering. In the course of doing a STEM Challenge, students see their failures as opportunities to improve their learning and skill at that particular challenge.
As I approach the topic of Growth Mindset with my students, I use a pretty simple lab. Students must build a flashlight, but there's a catch, they must do it one piece at a time and no one student can do two parts back to back.

Each group needs a disassembled flashlight (I get the mini flashlights from the Dollar Tree) with batteries. You will need to take it apart into as many pieces as possible. Students need to work together to build the flashlight in the fastest time. While it seems easy, this lab takes students awhile to figure out, then even longer to get a pretty fast time. The challenge of working together to build it, with each student doing different parts, is a tough one.
You can get the flashlight lab here. Ready to open the world of growth mindset to your students?
07 February 2016
February is Dental Health Month
February is Dental Health month (among other things), so we decided to do some dental health science labs. It was also a great opportunity to review variables. The set-up is really simple (and not too expensive, either). Did you know egg shells do a great job of mimicking your tooth enamel?


We are right in the middle of this lab, but we will be adding photos of our eggs throughout our five days of observations. You can use any liquids, but we used: lemonade, diet coke, coke, fruit punch, orange juice, V8 splash, mouthwash, and water (as our control). We cracked the eggs and covered one in toothpaste and left the other one alone. We then placed each half into its own container of the same liquid (one liquid per table group).
Here are some of the eggs after just two days in the liquids:


The top picture is of the eggs in V8 Splash and the bottom one is in coke. Can you believe that is after just 2 days? Yikes!


Variables are so tricky for my students, so we are using this lab as a review of these concepts. You can grab this lab pack here for under $2! I am working on adding the variables posters to the lab pack right now!
01 February 2016
School-wide January STEM Challenge - Build the Biggest Snowman
Every month, the classrooms in my building participate in a school-wide STEM challenge. For January, we focused on the book, "The Biggest Snowman Ever", by Steven Kroll. This challenge would work at anytime during the winter season!


As I was cruising down the hallway on my way out, I saw the most amazing snowmen in front of one of our 2nd grade classrooms! These kids did an awesome job with this challenge!


This STEM challenge is deceptively simple in appearance, but it will really challenge the kids to think! All you need is a 6 foot long sheet of white bulletin board paper. Students must make the tallest snowman possible from that single sheet of paper. These kids figured out how to use the round shape in the best possible way in order to optimize the paper.
If you are interested in this STEM challenge, click here!
02 December 2015
Want your Students to Try Coding?
The best site I have ever found for teaching students about everything coding is definitely code.org! My kids cannot get enough of this site! We started with the Hour of Code section, they currently have Minecraft, Star Wars, Frozen, Flappy Bird and more! We visit the computer lab once a month and on one of those days each month, we spend the whole time on this site. The coding challenges are perfect for elementary students!
 There are 14 different challenges to complete and they get more difficult as you go. There are tips and hints along the way AND more than one right answer! We share our answers and the kids are always very impressed with one another!
I have a few "Coding Unplugged" packs in my store in case students need practice with physical objects!

This is a website you should try TODAY!

I have a few "Coding Unplugged" packs in my store in case students need practice with physical objects!

This is a website you should try TODAY!
21 November 2015
Balloon Globe STEM Challenge
I love connecting STEM Challenges to other content areas, especially unexpected ones, like social studies. After learning all about the continents, oceans, and lines of latitude and longitude, we created these Balloon Globes.

This STEM Challenge requires pretty easy to find and cheap materials. Students just need punch balloons (I got a great deal on them at Amazon) and black sharpie markers. We started by marking the equator and prime meridian, then I pretty much let the kids go to work.

They all turned out great and it was a hands-on, engaging way to check student understanding of these topics. They also look fantastic hanging up in the hallway!
Looking for this STEM pack? Click here!

This STEM Challenge requires pretty easy to find and cheap materials. Students just need punch balloons (I got a great deal on them at Amazon) and black sharpie markers. We started by marking the equator and prime meridian, then I pretty much let the kids go to work.

They all turned out great and it was a hands-on, engaging way to check student understanding of these topics. They also look fantastic hanging up in the hallway!
Looking for this STEM pack? Click here!
Subscribe to:
Posts
(Atom)


STEM Breaks - A Quicker Way to STEM!
STEM Breaks are something I have been using in my own classroom for years! These short STEM activities give my students the opportunity to ...

Grab my button!

Popular Posts
-
 This is one of those classic science activities, that is always a HUGE hit with the students! Can you save FRED? This poor gummy worm...
 -
 Can you build a paper chair that can hold the weight of a stuffed animal? This STEM challenge is always one of my students' favorites! ...
 -
 I am so excited about our first school-wide monthly STEM challenge! This one requires very few materials! All you need is a pack of assort...
Ohio
